
Note: I have updated this tutorial. After wearing these masks for a while and receiving feedback from customers I have increased some of the measurements on both the fabric pieces and the elastic lengths so things don't fit so tight.
Here is a guide to how I make my cloth facemasks. These are two layer pleated masks with a filter pocket and a wire nose bridge. They can be made with elastic or ties. I got the original instructions from this video, but I wound up changing a few things and redrawing the templates so that's why I wanted to post this. But I'm definitely giving credit to the creator of the video. :) You may sew in the elastic/ties from the beginning the way she does; the reason I sew those in last is because I have more fabric than I have elastic on hand and this way I can pre sew the masks and then just insert elastic into the ones people ask for. You may use her templates (link in the video description) but I wound up wanting to tweak the sizes of the pleats and made my own.
MATERIALS NEEDED:
100% cotton fabric (prewashed)
1/4" or 1/8" elastic, or cloth strips such as bias tape
Some kind of wire, I was lucky and had a whole jarful of these on hand. You need something that's not too stiff, and at least 4" long. Try to get something that won't rust in the wash
Paper or cardstock
EQUIPMENT NEEDED:
Sewing machine
Iron and ironing board/surface
Scissors
Ruler
Printer
Chalk (optional)
Quilters clips or pins (optional)
Rotary cutter and mat (optional)
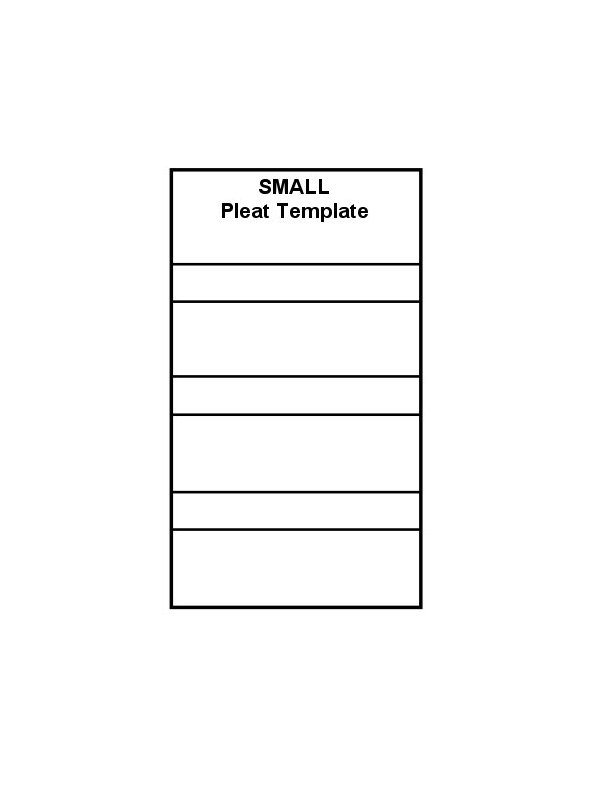
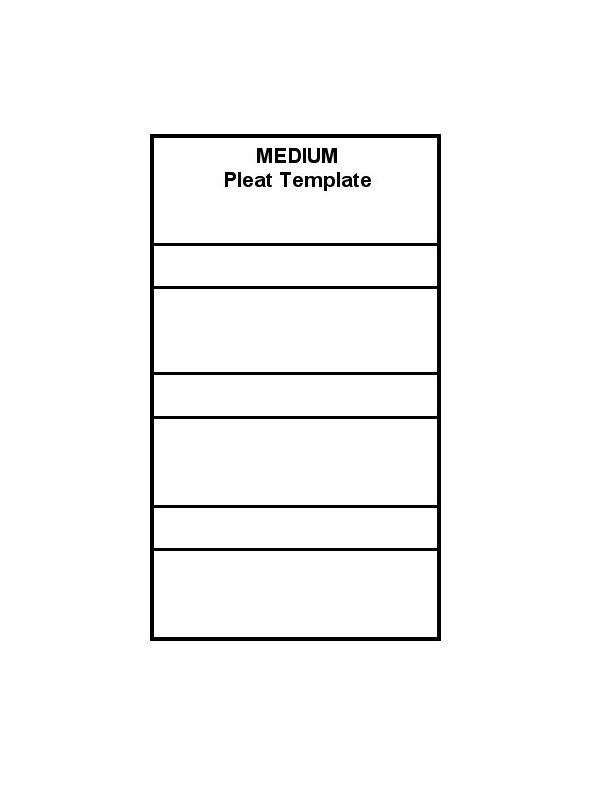
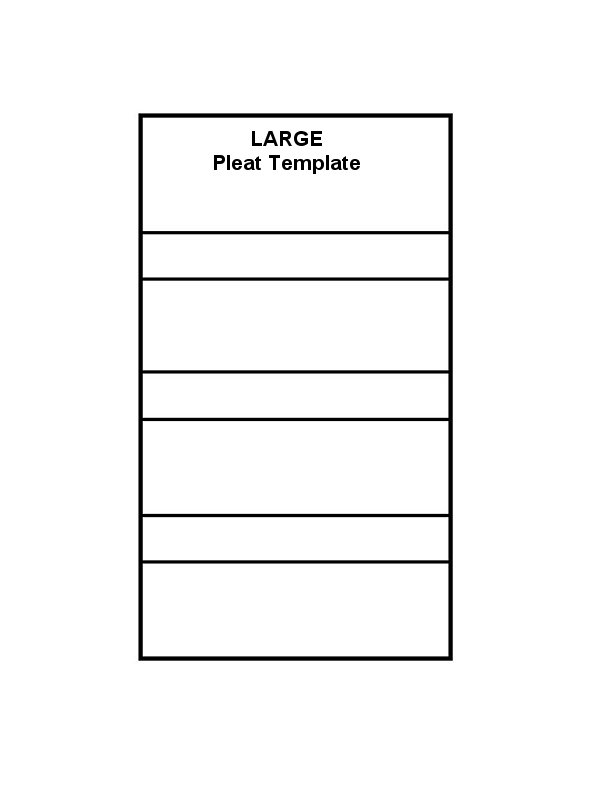
Small masks are 6" wide, medium are 7" wide, and large are 8" wide. I am a woman and wear the medium, and my brother prefers the large. I do not have children so I kinda don't know how the small fits on what ages, I'm sorry. The fabric size was suggested by the creator of the video linked to above. (Again I have since tweaked these measurements.)
Here are my templates, be sure to print them at 100% (on cardstock if you have it): SMALL MEDIUM LARGE


Mark one as front and one as back. Cut them out and using a straightedge lightly score the fold lines with something sharp like scissors to make them fold more cleanly.

Lay them back to back, then fold them up together accordion style as shown.

Cut your fabric into rectangles. Cut them 7" wide x 14" high for small, 8" wide by 15" high for medium, and 9" wide by 16" high for large. Cut your elastic, 2 each 8" for both large and medium and 2 each 7" for small. For ties cut 4 pieces of bias tape 30" long each for large or small masks, and I guess shorter for small. (Again I'm not sure as I don't have kids here.) Shown is a quilter's rotary mat and cutting wheel which makes doing this easier especially if you're making a lot of masks but it's not necessary.

If the fabric has a directional design be sure the design is right side up after it is cut. Shown are one of each size.

Fold fabric in half, short edges and right sides together. You need to leave an opening about 4" wide in the center, so mark your fabric if needed and then sew, making sure to reinforce the stitching on the inside (don't forget or you'll be sorry when you try to insert a filter).

If your fabric has a directional design be sure you are looking at the design upside down when you lay it on your ironing board. If it doesn't have a directional pattern take a look at both sides and if one side looks like it will look better as the front lay that side down. Roll the fabric towards you so the seam is about a half inch down from the top, then press everything, laying the seam open.

Sew the sides together, leaving a gap at the tops and bottoms. You need enough space to insert your elastic or ties at the end.

Turn right side out. Be sure not to poke the corners too hard so they don't flip out (just poke them back in if they do). Press.


Lay your front template on the front (non-opening side) of the mask and the back one on the back, sandwiching the fabric. Pinching the template in place fold up the mask, trying to keep the edges even. I like to use the front edge of my sewing table to push in the folds. This part takes some practice. You might need to watch the video linked at the top of the page to get how this works.


Lay the mask flat and arrange the pleats as straight as possible. Sew the sides from top to bottom, not too close to the edges since you still have to get your elastic/ties in there. Trim the threads and pull off the template. If it looks crooked rip out the offending pleat(s) and do them again. It happens. Press.


Turn the mask over and insert your piece of wire. 5" long is good for the medium and large sizes but something more like 4" is better for the small (it needs to fit between your rows of stitching). Sew around the wire to hold it in place. NOTE: you may want to bend over the ends of your wire to make it less likely they will escape in the wash.


Now you can insert your elastic or ties and sew them in place. Stitch the entire sides not just the top and bottom as the pleats need to be reinforced (if you used the method of sewing the elastic/ties in from the beginning be sure to sew down the sides again for reinforcement).

Here's the pocket on the back.

That's about it. You can look online for ideas on what to use for filter inserts. Good luck. I'm not super great at teaching, I hope this was okay. Be safe out there.
~Sparky

This page owned and maintained by C. "Sparky" Read.